First, we were eaten by a Grue. Then we were DOOMed. Now, we find out if Auvik can handle the QUAD DAMAGE(!) and run Quake. Why? Because we can, of course!!
Quake was released in 1996 by id Software as the follow-up to the wildly successful DOOM series. While not a sequel to DOOM, Quake built upon the DOOM technology and gameplay. While DOOM made FPS games (or DOOM clones as they were originally called) popular, Quake popularized “Deathmatch”. Otherwise known as the free-for-all, a deathmatch is a multiplayer game with a simple set of rules: kill your opponents as many times as you can before the time runs out.
The game was originally available for MS-DOS, Amiga, Mac, Sega Saturn (I logged the most time on this version!), and Nintendo 64. Like DOOM, it’s been ported to a wide variety of devices and platforms. Cool fact, the very first port of Quake was to Linux—with the port created by id software’s John Carmack himself. Id software was definitely a trailblazer for Linux gaming.
And so it’s fitting that it’s Linux – specifically Ubuntu – that we’re going to use for running Quake inside of Auvik. That’s right. I’m going to show you a fun way to (safely and legally) get OG Quake up and running inside your instance of Auvik.
A Brief History of Quake
OK, chances are if you’re here, you already both know and love Quake. So we won’t deep dive into the history of the franchise, we’ll leave that to the team at Noclip, who spoke with Tim Willits, former studio director, co-owner, and level designer of id Software, about the saga that’s been 25-plus years of Quake
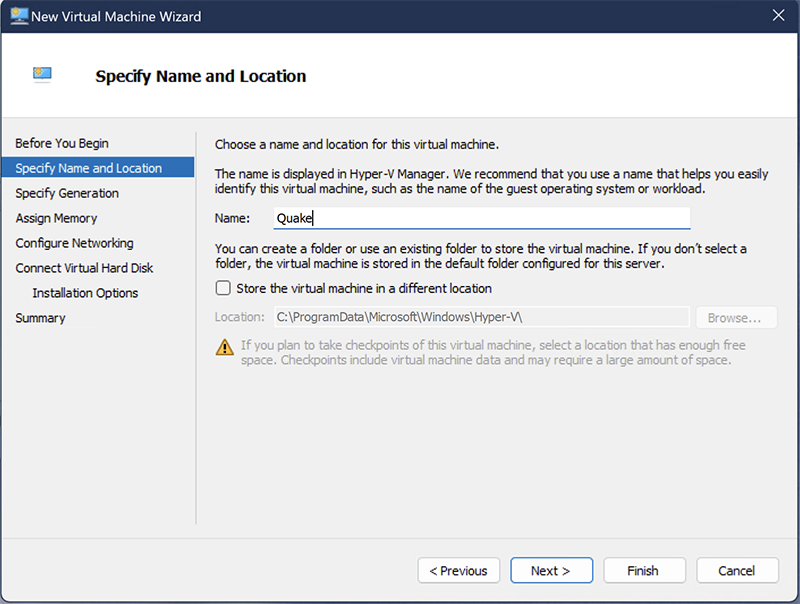
Step 1: Set up a Virtual Machine
First, we need a VM for our experiment. I’m going to use Hyper-V to create the VM for Quake. You probably already know how to do this, but just in case.

I picked Gen 1 just to make things simpler.
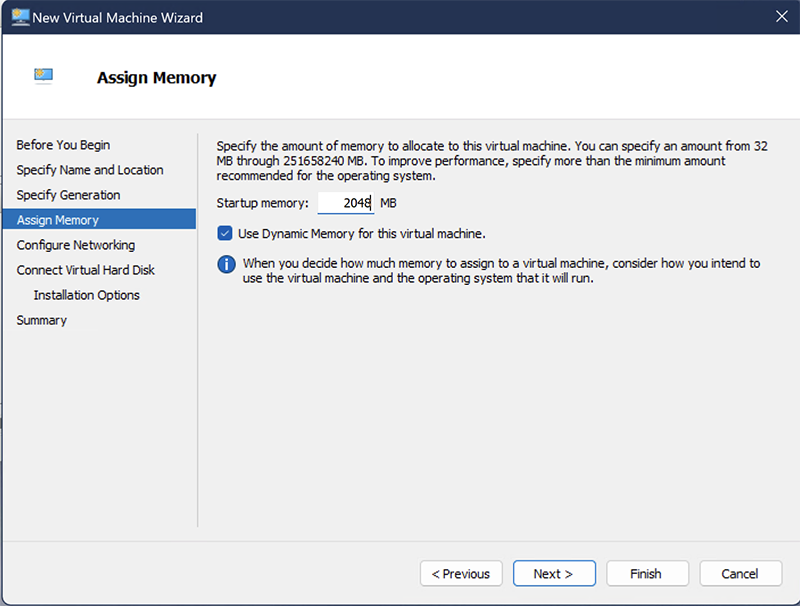
I set the memory to 2GB just to be safe. Unlikely that we’ll actually use that much.
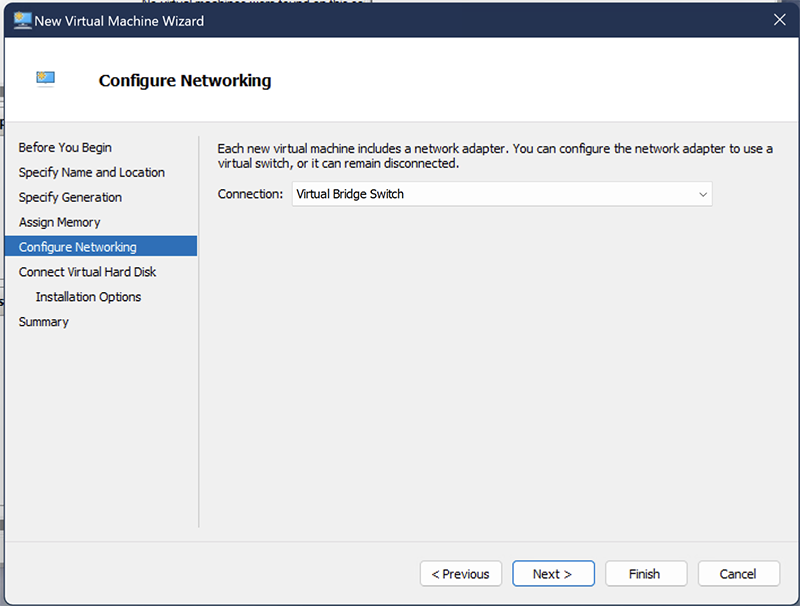
For networking, I’m going to use a bridge switch that I’d made previously. The default Hyper-V virtual switch won’t suit our purposes because it’s NATed and doesn’t have direct access to the rest of the LAN. We want the Auvik Collector to be able to talk to our new VM.
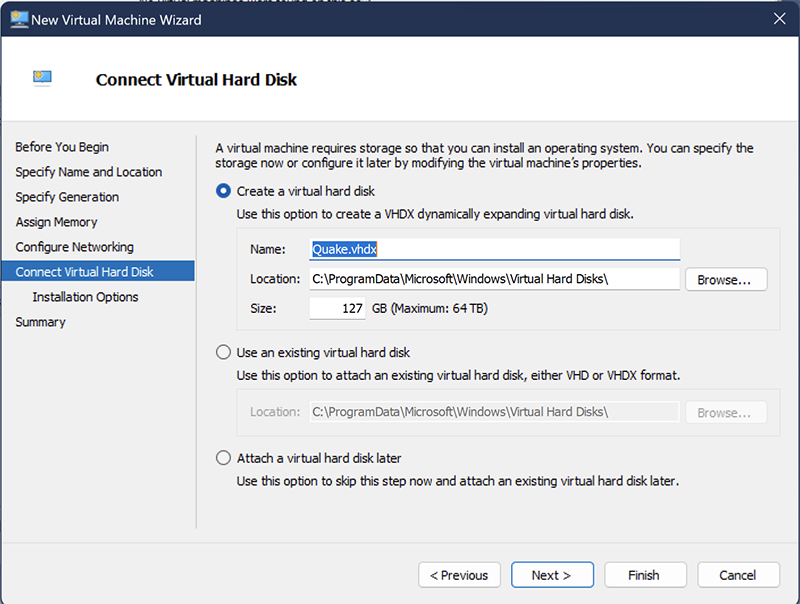
I set the Virtual Hard Disk to 20GB. Safely more than we’ll need.
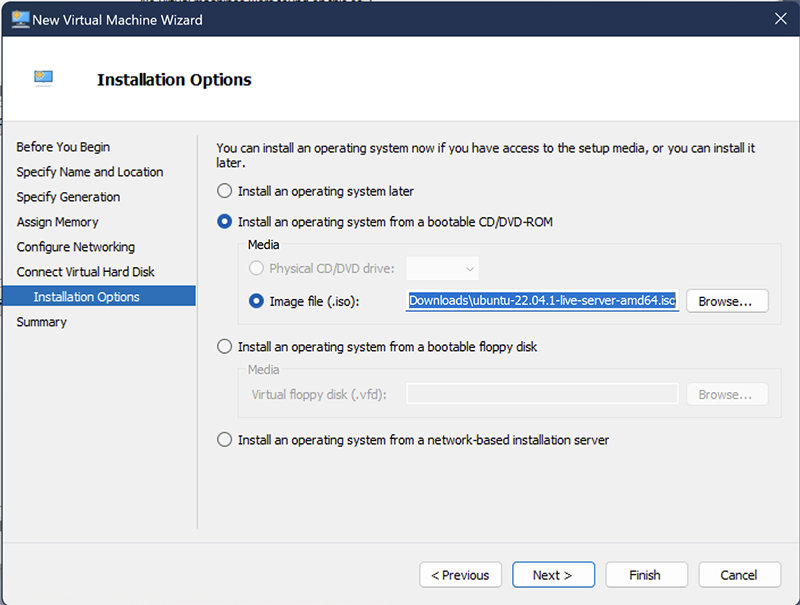
Next, we start the VM and connect to it and go through the Ubuntu installation. I’m going to leave everything mostly at default during the installation.
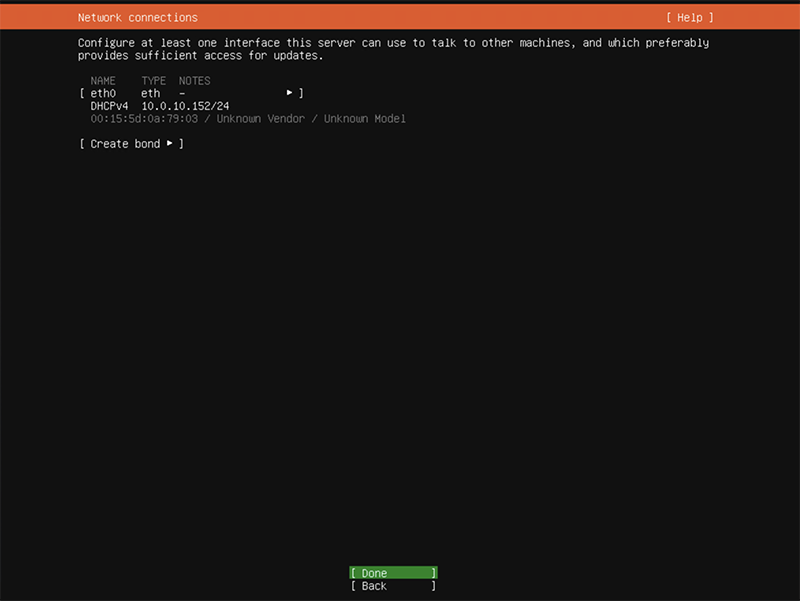
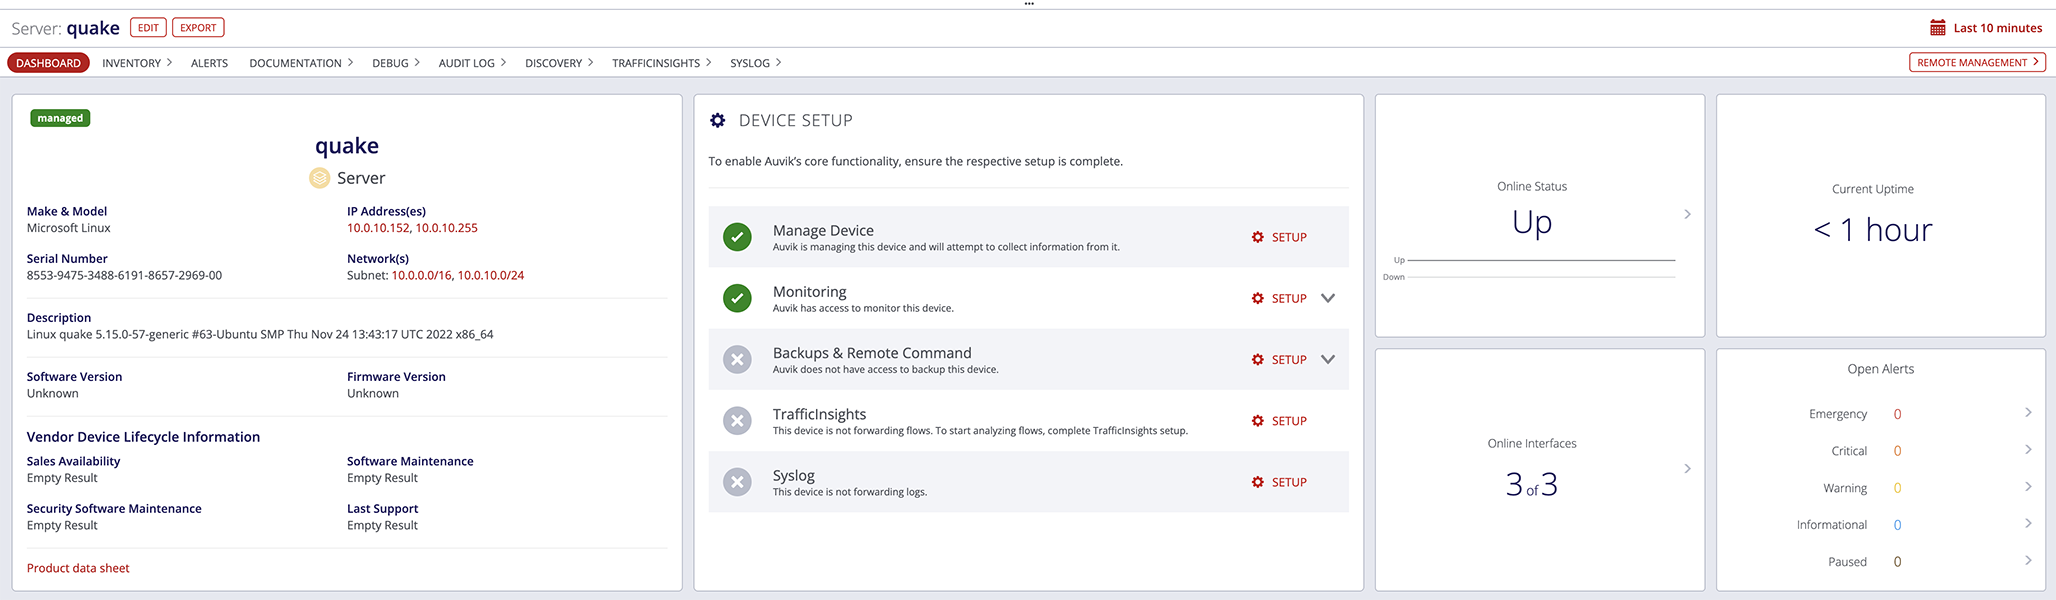
The network connections screen shows me that the virtual bridge switch is working as intended. The Quake VM has an IP address on my LAN.
Then we’ll name our VM.
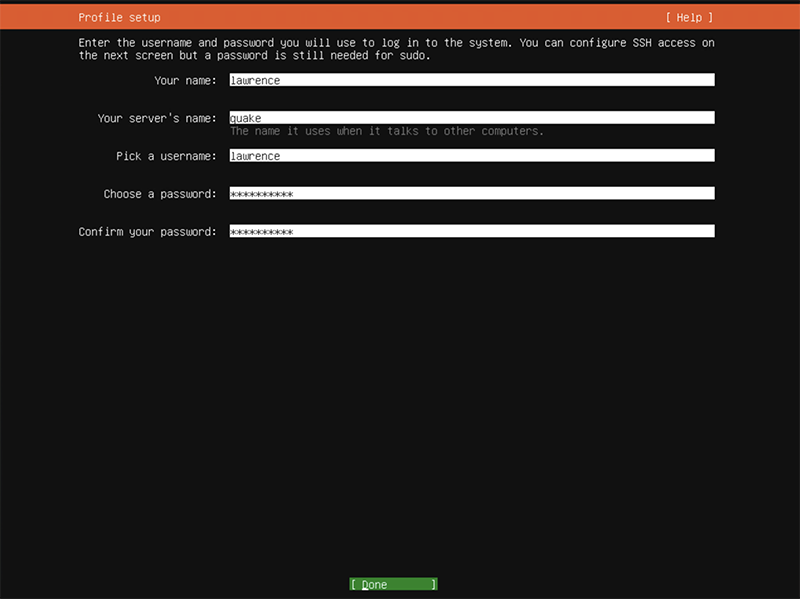
Make sure to install an OpenSSH server – as the ability to SSH to the VM will make the rest of this easier and quicker.

Give it a few minutes to install and reboot and we’re ready to go!
Step Two: SSH and Auvik
Now we can SSH directly into our VM. From here on I’ll be entering the commands via a SSH terminal on my Mac.
First, I want to update Ubuntu.
sudo apt-get update && sudo apt-get upgrade
Next, let’s get SNMP installed so we can monitor the VM in Auvik.
sudo apt-get install snmp snmpd
And let’s configure SNMP by editing /etc/snmp/snmpd.conf
sudo nano /etc/snmp/snmpd.conf
Change the agent address line to:
agentAddress udp:161,udp6:[::1]:161
Tip: change the rocommunity line if you want to use a community string other than public.
Finally, restart the snmpd service:
systemctl restart snmpd
And there it is! Our VM is now ready to be monitored by Auvik.
Step 3: Install Quake
Now we can start to install NetQuake.io
First, we need to download NetQuake.io from https://gitlab.com/joe.lukacovic/netquake.io
I extracted the zip on my Mac and then used SFTP to transfer the unzipped folder to the Quake VM.
NetQuake.io requires node.js version 16 or higher. Ubuntu 22.04 comes shipped with version 12. So I’ll need to manually install version 16.
curl -sL https://deb.nodesource.com/setup_16.x -o /tmp/nodesource_setup.sh
sudo bash /tmp/nodesource_setup.sh
sudo apt-get install -y nodejs
Then we need to install npm
sudo apt-get install npm
Then install and run NetQuake.io
npm install
npm run start:dev
It’ll be running on port 8081, so we need to add that port to the HTTP service in Auvik.
From the Auvik main menu, click on Inventory > Services
Tick the box for HTTP and click Edit:
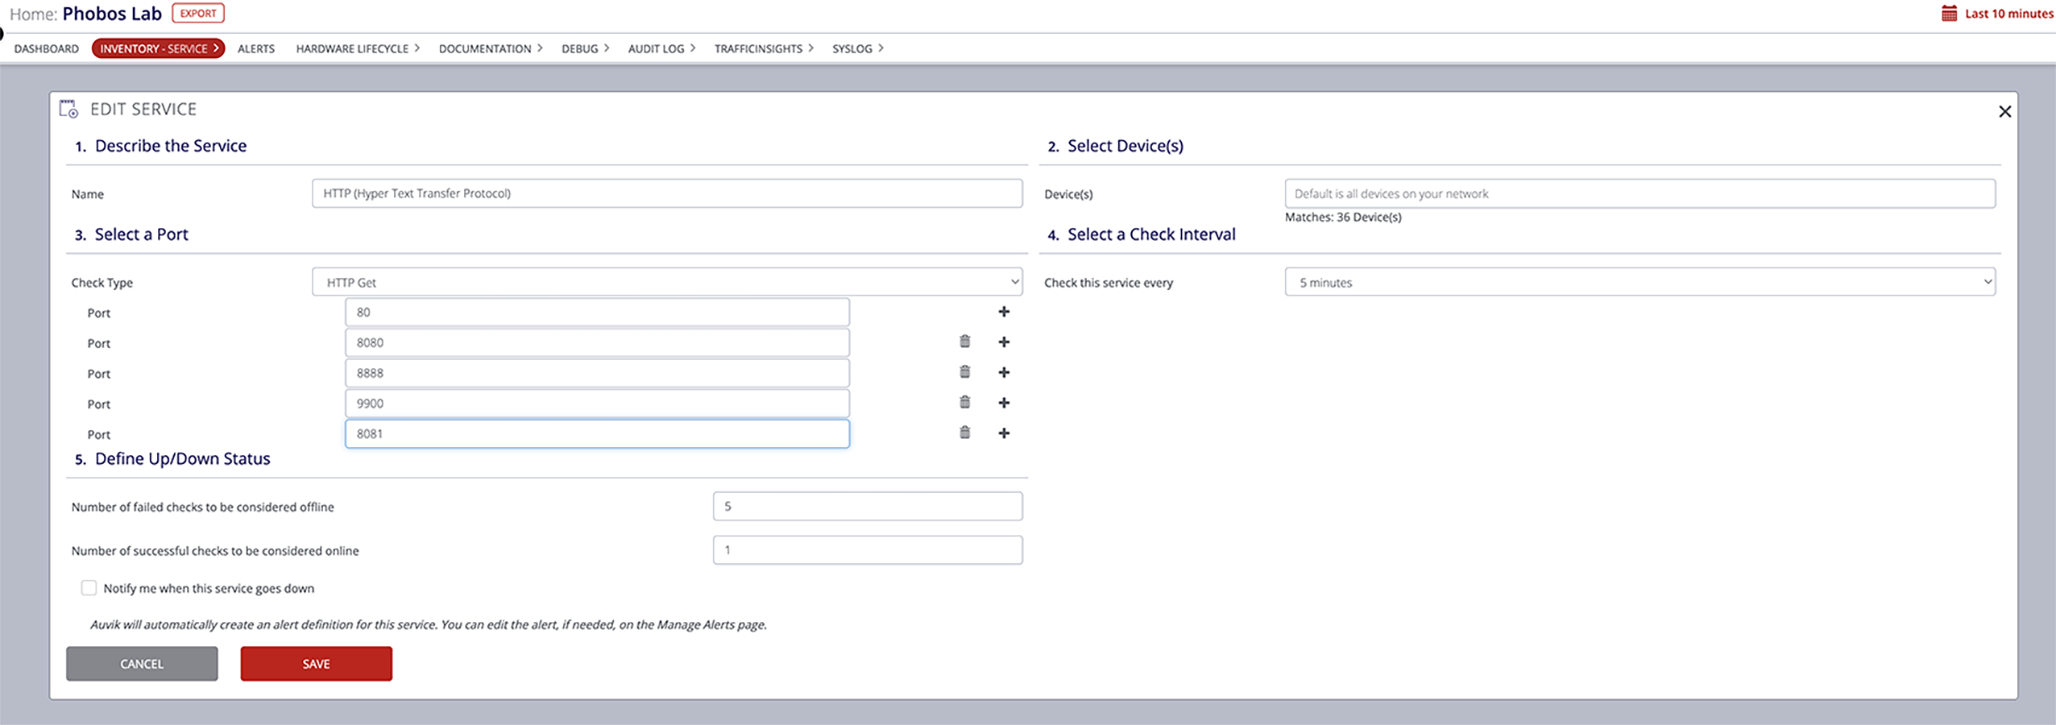
Click + to add a port and enter 8081
Now, when I click on the Quake VM, the Remove Browser option will be present.
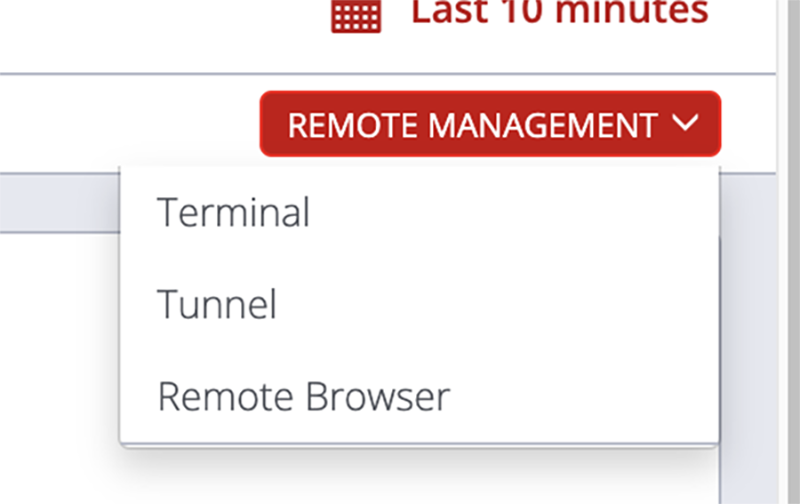

Now we can launch NetQuake from within Auvik.
Step 4: YOU HAVE TAKEN THE LEAD
Success! We’re running Quake inside Auvik.
BONUS ROUND!
Want to just jump in and play some quake now that you’ve made it this far? NetQuake.io has a shareware version you can play right in your browser. Enjoy!