
Though I’m a big believer in the importance of network configuration management, even I’ll admit that network switch configuration from a command-line interface (CLI) is still one of the most fundamental network engineering skills you can have.
It’s also one of the harder things to pick up if you’re new to the field. And it’s not just knowing what commands to enter. It isn’t always obvious what should be part of a basic configuration.
So to help all the aspiring network engineers, or seasoned pros looking for a refresher, we’ve put together this basic guide on how to set up a switch.

A go-to guide for IT pros of every level
Understand spanning tree config, get strategies for why and where to put switches, calculate ports needed, and more best practices to keep your network operating smoothly.
What is a network switch?
There are a lot of devices that fall into the “network switch” category. Since we’re talking about configuration, we’ll be referring specifically to managed switches in this article. It’s worth noting how you configure a Layer 2 vs Layer 3 switch will be different, as will small office/home office (SOHO) vs. enterprise switches. And don’t forget there’s always going to be small differences between vendors and software versions.
Because Cisco is so common, and its IOS-style CLI is used on more than just Cisco switches, we’ll focus on command-line configuration of Cisco switches running 15.x IOS as our prime example. But you’ll be able to use what we cover here in lots of different environments. In fact, because many of the commands and concepts apply to routing devices too, this can also be a good reference for basic router and switch configuration.
From a network perspective, we’ll focus on features related to Layer 2.
What basic switch configuration includes
Basic switch configuration can be thought of as the minimum network, port, and security provisioning required for the production deployment of a switch. In practice, your exact needs will vary from environment to environment. And overall, effective switch management is a detailed topic in its own right.
Our goal here is to cover some switch configuration basics that are applicable to most production use cases. These include configuring switch management settings, hardening the switch, and VLAN configuration.
Getting started: things to know before setting up a network switch
There are a lot of nuances related to the configuration of a switch that aren’t obvious to beginners. Here are some basic tips to be aware of before you start.
Command line completion, the tab key, and up/down arrows are time savers
Typos are a pain, and typing out long commands is tedious. Fortunately, Cisco’s IOS has features that can help you avoid typos and work faster:
1. Command Line completion. Once you type enough of a command that it is unique, you can just hit enter. For example, instead of typing “configure terminal”, you can use the command “config t” like this:
Switch#config t
[Enter configuration commands, one per line. End with “CNTL/Z”.]
Switch(config)#

2. Tab completion. Hitting the tab key once you have enough unique text on the screen will auto-complete a command. For example, hitting tab after “conf” auto-completes to “configure”:

3. Command scrolling with up/down keys. Need to rerun a command? You can scroll through your command history with the up/down arrows on your keyboard.
4. Bonus! Use “?” for added help. Hitting “?” at the beginning of a command prompt will show you all the commands that are available in the current context. Hitting “?” after a command will show you all the parameters that are available in that context.
Access levels and modes
There are several Cisco access levels and modes that allow you to run different commands. You can learn more about each mode in the Cisco IOS command hierarchy, but the table below is a reference for our examples.

Console ports and cables
When you’re connecting to a switch for the first time, you’re often doing it through the console port. Usually, this is done by connecting a serial cable to the switch. You can also use a USB to serial adapter to make the connection.
Once the physical connections are made, how can you actually access the CLI? By using a terminal emulator. For Windows, there are several popular emulator options, like Putty, RealTerm, and TerraTerm. MacOS can make use of the same emulators as Linux, including screen, minicom, and tmux.
If you’re looking for out-of-band (remote) access to the console ports on switches, routers, and firewalls, consider using a console server.
Startup config vs. running config
Your switch actually has two “config” types and locations. A switch’s running config is stored in RAM. Its startup config is stored in nonvolatile memory.
Why is this important? Take it from someone who has made the mistake too many times: if your configuration changes aren’t saved to the startup config, you’ll lose them when the switch reboots. As you make changes to the running config, you’ll see them take effect in real time. However, you need to explicitly save those changes to the running config for them to persist. Save yourself some pain and double-check before moving on.
How to configure a network switch
Now that you know the basics, we can move onto the commands. Here, we’ll walk through 10 of the most important basic network switch configuration steps.
While any particular production deployment will likely require specific additional steps (e.g. for additional hardening and user management), these commands will help you hit the ground running.
Note: Our example commands and output were generated using Cisco Packet Tracer’s default 2960 switch running SW version 15.0(2)SE4.
Step 1: Connect to the console
If you’re labbing with a simulator/emulator or accessing the CLI via SSH, you can skip this step.
You need to start with a connection to the console port. That means configuring your terminal emulator software and connecting your rollover cable between your switch’s console port and your PC.
Many Cisco switches use these serial settings:
- Baud rate: 9600
- Data bits: 8
- Stop bits: 1
- Parity: None
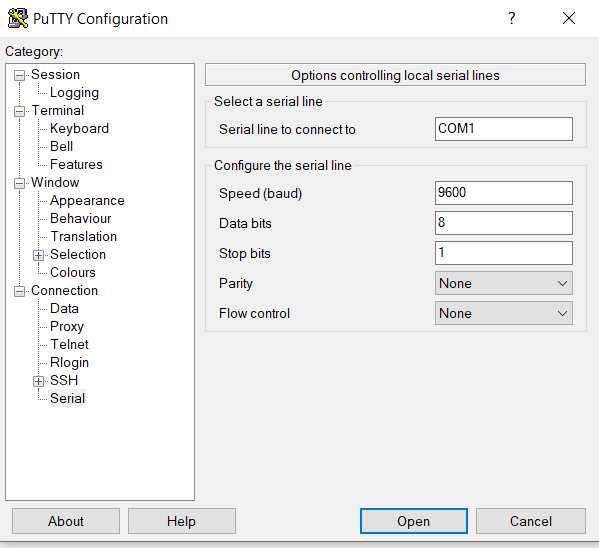
Assuming your PC’s serial port is COM1, if you use Putty and Windows, you can set the session up like this (under the “Serial” options in the menu):
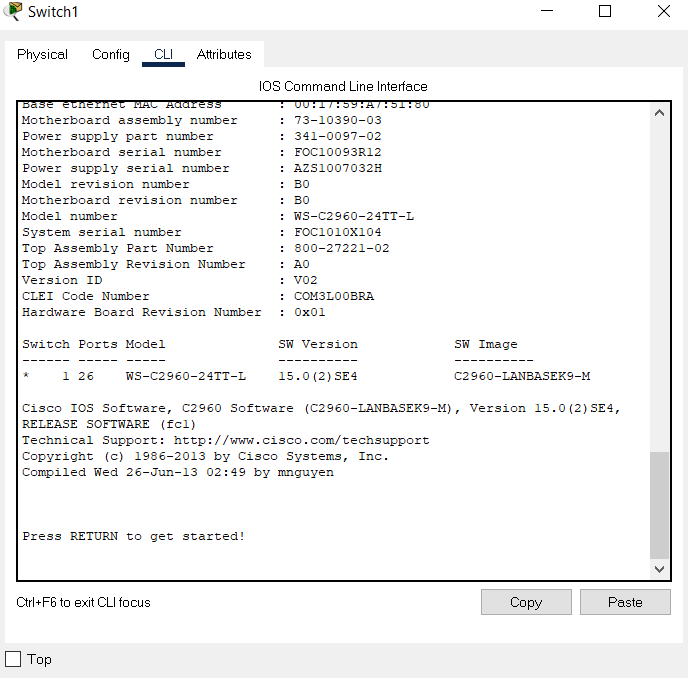
Once your cable is connected and the session is set up, click open. Then press enter to get a response at the terminal window.
Step 2: Set a management IP and default gateway
The management IP address is where you can log in to the switch for future administrative tasks. Once your management IP is set up, you can use it to SSH into the switch and configure it over the network.
First, we access Privileged EXEC mode with the “enable” switch configuration command:
Switch>enable
Switch#
From there, we enter Global Configuration mode with “config t” (or “configure terminal”):
Switch#config t
[Enter configuration commands, one per line. End with “CNTL/Z”.]
Switch(config)#
Next, we access the VLAN interface:
Switch(config)#interface vlan 1
Switch(config-if)#
Now, we can assign the management IP and subnet. In this example, I’ll assign 10.10.11.11 with a 255.255.255.0 subnet. Be sure to replace that with the correct values for your switch!
Switch(config-if)#ip address 10.10.11.11 255.255.255.0
Switch(config-if)#
We can exit interface configuration mode and assign a default gateway for the switch from global configuration mode.
Switch(config-if)#exit
Switch(config)#ip default-gateway 10.10.11.1
Switch(config)#
Step 3: Set hostname and domain name
In addition to setting the IP address of the switch, you should give it a logical hostname. To do that, we enter global configuration mode and use the hostname command:
Switch(config)#hostname PepperAndEggSwitch
PepperAndEggSwitch(config)#
Similarly, we can also add a domain name with the domain command:
PepperAndEggSwitch(config)#ip domain-name cafeJohnny.local
PepperAndEggSwitch(config)#
Step 4: Set logins on VTY lines and console port
Strong passwords are an important part of hardening a managed switch, so next we’ll add a password to all virtual terminal (VTY) lines. Our switch has 16 VTY lines which are used for remote access, so we’ll configure the entire range from 0-15:
PepperAndEggSwitch(config)#line vty 0 15
PepperAndEggSwitch(config-line)#password BigSecretDon'tT3ll@ny1
PepperAndEggSwitch(config-line)#
Next, we’ll exit the VTY configuration, access console line 0, and assign it a separate password:
PepperAndEggSwitch(config-line)#exit
PepperAndEggSwitch(config)#line console 0
PepperAndEggSwitch(config-line)#password BigSecretForConsoleDon'tT3ll@ny1
PepperAndEggSwitch(config-line)#
Step 5: Set Privileged EXEC password
In addition to password protecting the VTY and console lines, we can and should protect Privileged EXEC mode with a password.
We can do that from global configuration mode:
PepperAndEggSwitch(config-line)#exit
PepperAndEggSwitch(config)#enable secret Top$ecretPrivEXECpassWORD
PepperAndEggSwitch(config)#
Note: Because switch security is a complex topic, and we’re focused on the basics, we won’t go into user management here. However, be sure to properly configure users or remote authentication servers before a production deployment.
Step 6: Enable SSH
At some point, you’ll find yourself in need of access to your network devices, and you’re not physically in the same room as them. To access a switch’s CLI over the network, you’ll need to use Telnet or SSH. From a security perspective, Telnet is usually a non-starter because data is transmitted in plaintext. That leaves us with SSH.
The first step to enabling SSH is generating the RSA keys:
PepperAndEggSwitch(config)#crypto key generate rsa
The name for the keys will be: PepperAndEggSwitch.cafeJohnny
Choose the size of the key modulus in the range of 360 to 2048 for your General Purpose Keys.
Choosing a key modulus greater than 512 may take a few minutes.

How many bits in the modulus [2048]:
% Generating 2048-bit RSA keys, keys will be non-exportable...[OK]

PepperAndEggSwitch(config)#
Next, we’ll set the SSH version to 2:
PepperAndEggSwitch(config)#ip ssh version 2
*Mar 4 7:4:9.374: %SSH-5-ENABLED: SSH 1.99 has been enabled
PepperAndEggSwitch(config)#
Now, we can set SSH up on specific VTY lines. I’ll use the first 6 lines here:
PepperAndEggSwitch(config)#line vty 0 5
PepperAndEggSwitch(config-line)#transport input ssh
Finally, we’ll tell the switch to check the local users’ database to authenticate users:
PepperAndEggSwitch(config-line)#login local
PepperAndEggSwitch(config-line)#
Step 7: Create VLANs
One of the most obvious reasons to use a managed switch is the ability to create VLANs to separate network segments. We can do that by using the vlan command, and then assigning our VLAN a name. For example, to create VLAN 2 and name it “cafe”:
PepperAndEggSwitch(config-line)#vlan 2
PepperAndEggSwitch(config-vlan)#name cafe
PepperAndEggSwitch(config-vlan)#
You can now exit, and repeat these steps for as many VLANs as you need.
Step 8: Add access ports to a VLAN
After we create our VLANs, we can add ports to them. For example, to add ports 5, 6, and 7 as access ports in VLAN 2, we can use these switch configuration commands:
PepperAndEggSwitch(config-vlan)#exit
PepperAndEggSwitch(config)#interface range fast
PepperAndEggSwitch(config)#interface range fastEthernet 0/5-7
PepperAndEggSwitch(config-if-range)#switchport mode access
PepperAndEggSwitch(config-if-range)#switchport access vlan 2
PepperAndEggSwitch(config-if-range)#
Step 9: Configure trunk ports
If you need one port to transmit traffic from multiple VLANs, you’ll need to designate it a “trunk port”. To make a port a trunk port, we simply access its configuration and set the mode to trunk. For example, to make port 2 on our switch a trunk port:
PepperAndEggSwitch(config-if-range)#exit
PepperAndEggSwitch(config)#interface fastEthernet 0/2
PepperAndEggSwitch(config-if)#switchport mode trunk
PepperAndEggSwitch(config-if)#
Step 10: Save configuration
When our configuration is complete, we can save our changes to the startup configuration. Don’t forget this step, or all your work will be gone come the next switch reboot!
PepperAndEggSwitch(config-if)#exit
PepperAndEggSwitch(config)#exit
PepperAndEggSwitch#
%SYS-5-CONFIG_I: Configured from console by console

PepperAndEggSwitch#copy running-config startup-config
Destination filename [startup-config]?
Building configuration...
[OK]
PepperAndEggSwitch#
What does an effective switch look like?
After you complete a network switch configuration, how do you know if it will be effective? Frankly, there is no one-size-fits-all answer. Generally, an effective switch is one that is both secure and well performing given the requirements of its specific environment. Understanding if your switch configuration is effective begins with establishing those baseline requirements and monitoring performance.
Auvik is a great resource when it comes to measuring your switches’ health and performance, making changes and automatically backing up your configurations, and proactively monitoring for any potential issues. Give Auvik a try, free for 14-days, to see the difference it can make.
If there’s something we missed, or you’d like us to cover in more detail, let me know in the comments! Once you’re comfortable with the basics, there’s plenty more to learn when it comes to effective switch management and network design best practices.
As you go through the process of making your network more manageable, consider Auvik.
Your guide to selling managed network services
Get templates for network assessment reports, presentations, pricing & more—designed just for MSPs.


This is fantastic, i am a bigginer in networking and i was so impressed.you are networking gurus you guys and i would like to thank you for these tutorials please keep it up and and i hope to be your client one day…..if there is a chance of learning more of these tutorials please let me know, i am more than desperate to be a network engineer one day…. right now i am working for a big organization and they need more network technicians i wish to be one of them one day and we will become one of your biggest consumer of all your services.
I have a new switch, and a want to create LAN Network with 6 PCs on the network. If I did the above steps, is it enough to enable the connection.
Well summarized